Wednesday, April 2, 2014

Scout Art Project


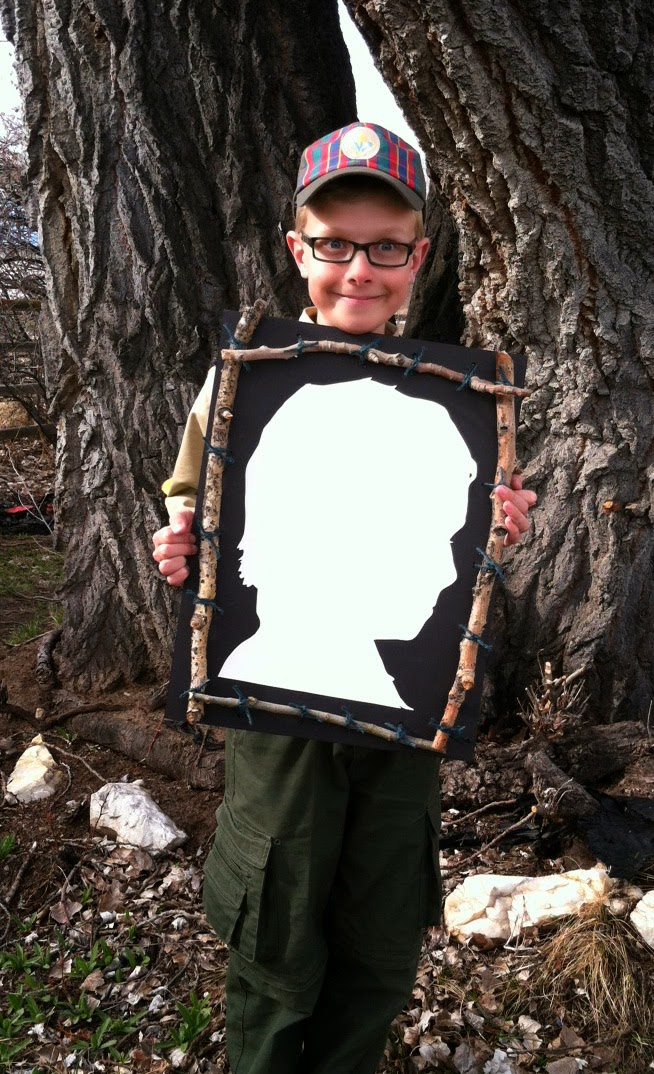
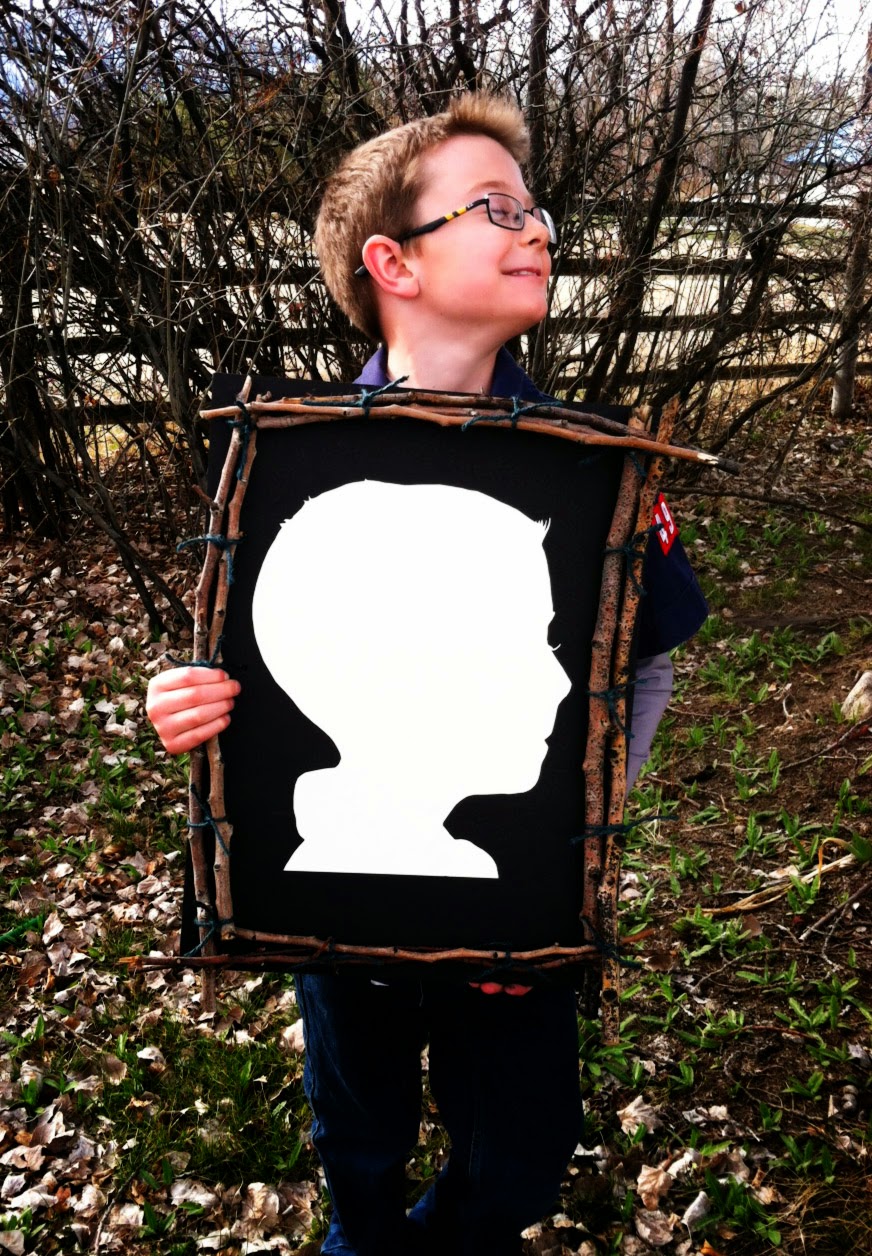
Originally my son's scout leader had asked me to help my son and two other scouts to make some things with them to earn their Art Badge. I thought that we could make some silhouettes since they are only this age for so long. I managed to capture the likeness of their faces and unique features of each one. Then I asked the scout leader if she could pick up some kind of black background and she had found these black foam boards at Walmart for a really cheap price. Since part of the requirement for the badge is to make a frame, I thought it would be really neat if we could somehow frame these with branches. She took us to a friend of hers house where we found many branches that had fallen down during the spring winds. Upon arriving to her friends house I discovered that the entire front room of her house was devoted to creativity! It was the ultimate crafters' delight. A room as big as my kitchen, dining and living room put together. Full of bins containing every crafty, artsy kind of thing imaginable. The scout leaders friend told me that this room was made with the purpose for her four teenagers in hopes that they might create things instead of being sucked into the gaming world or television. She explained to me that her teens and their friends prefer to spend time in this room creating and chatting about life. Between the three of us and this amazing room we came up with these amazing frames. We marked several pairs of holes all along the top, bottom, and sides. Then using these giant nails we poked them through the foam board. After that we measured out some colored green twine and cut several for the holes about 10-12" long each. We used pipe cleaners to pull the twine through each hole. Then secured the branches creating a frame for each side. The results were so amazing. I had to share with you all, especially since I thought that there might be other moms like me trying to figure out what to do with their scout to help him earn his badge. I hope that this was helpful, I would like to know if it was. You can use this to make up your own or different versions of this project.

Keep fueling your creativity!

Abby

Saturday, August 31, 2013

September Desktop Calendar


Here is your new desktop calendar for September 2013!
Simply click to enlarge and save image to your computer. Then change your desktop.
Hope your all having a splendid summer!

Enjoy!

Abby

Friday, August 2, 2013

August Desktop Calendar


Here is your new desktop calendar for August 2013!
Simply click to enlarge and save image to your computer. Then change your desktop.
Hope your all having a splendid summer!

Enjoy!

Abby

Tuesday, July 30, 2013

Fabric Flowers


I wanted to do a little bit of experimenting with some fabric and notions that I had in my fiber/fabric crafting closet. These where the first of those. I will later add pins to the back to that I can accessorize my wardrobe a bit.


I made this for my BC(by choice) sister. Her favorite color is purple, so I based it off of that. Using all antique fabrics.


I made this for one of my etsy shops.
It's kind of a country flower, although if your a Red Hat Lady it would make a cool accessory!


These petals are made entirely of imported silk fabric and is also in my etsy shop.


I was think of our local county fair when I made this. I envisioned wearing blue jeans maybe Wranglers or Levi's and sitting in the stands of the cowboy arena watching the men and women roping cows and riding bullls, eating cotton candy or some seasoned corn on the cob and listening to someone sing The Star Spangled Banner. This item is also available in my etsy shop.

Interested in making your own fabric flowers I found this great blogger called The Crafty Blog Stalker that has put together 20 different kinds that you can make with photos and links on how to make them yourself!

Enjoy and good luck with your next art or craft project!

Abby

Sunday, July 28, 2013

Felted Bowls


After clearing out and organizing 4 closets in my house. I discovered that I had a lot of fiber! I looked up online projects and tutorials and found this great site full of wonderful wet felting tutorials. My son wanted to give it a try as soon as I started my little bowl only he wanted to make a larger one. The result was as I discovered that you can make this with your child of 10 but you can't expect that his attention or patience will last longer that 2 hours. Which is what happened in my case. This project took about 3 to 3 1/2 hours. Well gratifying but hard to keep track of two at the same time. So my recommendation would be to try only one and to do a small one first before you get all wrapped up and carried away like I did! Give it a whirl, it is a real fun project. The tutorial was found on Annie and Lyn Rosiepinks website for wet felted pods. Only need to click on the highlighted words and it will take you right where you need to go. 

Good luck with your felted projects!

Abby

Sunday, July 7, 2013

DIY Lavender Wands


It's that time of year that the fragrance of Lavender bushes keeps us awake until the stars appear out of the evening skies. At least that is what it does for me, besides allowing my mind to gently drift toward my pillow. Lavender is said to be a calming or relaxing scent. I find this to be true for me. Lavender wands have been around since Edwardian times. Most blogs and YouTube videos that I looked up all had woven theirs using one stem at a time. You may chose to do whatever you like with yours of course. I chose to do two at a time with mine using 18 stems total. 

To make wands you will need these items listed below:

18 stems of blooming lavender about 12" to 18" long
3 1/2 to 4 feet of ribbon or satin ribbon 1/2" to 5/8" wide
Fabric scissors 
Kitchen scissors or all purpose scissors


Step One

With your 18 stems start to line them up so that the bottoms of the blooms are matched with one another.


Step Two

Tie the ribbon on the gathered stems just below the blooms about 1/4".


Step Three

Turn stems upside down.


Step Four

Begin weaving ribbon with stems one or two stems at a time. I personally chose to do two at a time. It's up to you to however you'd like to do it. The first two stem need to be gently pulled down then placed the ribbon over the top of it. Next pull two more down and place over the top of the ribbon. Continue in this manner until all stems are down. Keep weaving ribbon two stems at a time until you get to where there are no longer any blooms and only the stems remain. 


Step Five

Start to wrap the stems until you get about 1" from the bottom of them. Tie a knot. Then tie a bow using the images below to help you along the way. 


Rip off excess leaves at the bottom.


Tie a knot.


Starting the bow. With the back of your hand holding the knot, loop the ribbon over the top with excess length on either side of the wand and into the back.


Place ribbon back over the top.


Holding the ribbon steady on the top and against your leg at the bottom, tie your bow like a knot using the excess ribbon on either side of the wand.


Once you've got your bow into place you may open the bows gently and firmly.


Step Six

Cut the stems of at a right and left angle.


The wand will take some time to dry, perhaps 5-7 days. You could keep it in a clothes drawer or by your night stand and if you rub the blossoms together it will revive the smell again and again. You could also add lavender oil to it as it gets older to keep its smell longer. I heard that they can last for many years though. 

I would be very pleased and appreciative if you could kindly let me know if this blog entry was at all useful to you. When I first looked up how to make my own lavender wand it took me about three different sites to figure it all out on my own. I hope the instructions and photos will give you everything that you need to make your own.  

Enjoy!

Abby


Monday, July 1, 2013

July Calendar Desktop

Here is your new calendar desktop. I hope that it feels of true summer to you as it does for me. This was one of my sons favorite treats early July summer had to offer in our backyard. He learned  quickly not to eat the green colored ones. This was a staple in his breakfast at that time. He use to come in smiling ear to ear with raspberry all over his cheeks and nose. It makes me smile to think of what a wonderful memory that was. Enjoy this month's desktop calendar and I hope it brings you and yours happy memories this July as it had for mine so many years ago.


Enlarge and then save for your desktop.

Enjoy, 

Abby