Showing posts with label recipe. Show all posts

Monday, March 18, 2013

German Pancakes

This is a great tradition at our house on the weekends. I get special requests for it from time to time. It is something that fills us up past our normal lunchtime. It is quite filling. 


This is what it looks like before we put anything on it.


My husband likes his German Pancakes with Peanut Butter and Syrup.


This one's just come out of the oven ready to be served on the warmed plates. 

Funny story about these pancakes. I called my mom one day when my husband and I were first together and asked for her German Pancake recipe. I understood the recipe so I thought. I used the entire recipe per pie pan. So instead of only two eggs per pan there was 4 and double everything. It was quite intimidating to eat. In my embarrassment I called back my mom and said, "the pancake were good mom, but I don't remember them being that thick!" She said not that was for two not one! Well my husband and I didn't feel like eating for the remainder of day, but we couldn't have went without food for three days, that's how filling they were. 


German Pancakes

4 eggs
2/3 Cup milk (I use rice milk and it works just fine)
2/3 Cup all purpose flour
2 Tablespoons sugar
2 Tablespoons melted butter
Sprinkle of salt (optional) 

Grease 2 pie pans very well. Preheat oven to 425 degrees. Blend eggs on high in a blender. Then change speed on blender to low and add milk, slowly add flour, and melted butter, sugar and salt. Turn back to high on the blender. Then stop blender and pour equal amounts between both pie pans. I also use round 8 or 9" cake pans if you don't have any pie pans. Place in oven and bake for 10 minutes. Lower temp to 325 degrees and bake an additional 10 minutes. Serve immediately on warmed plates.

You can add butter and peanut butter and then syrup, butter and powdered sugar or simply eat it the way that it is come straight from the oven.

I hope you enjoy this recipe as my family has for the past 30 years!

Abby


Sunday, February 24, 2013

Lactose Free Carrot Ginger Bran Muffins


Trying something new today and it turned out to be something amazing. 


Here are my best young taste testers! There is one way to get them to eat their fruits and vegetables with natural sweetener of honey!


This recipe makes 24 regular sized muffins.


All finely shredded carrots were from our new Omega Juicer. I figured that why not use the the pulp that you can't drink for something nutritious and delicious! We got ours from Amazon. If you click on the highlight one on this blog you will get to it from there. 

Carrot Ginger Bran Muffins

2 Cups all-purpose flour
2 Cups whole wheat flour
1/2 Cup wheat bran
4 teaspoons baking powder
1 teaspoon baking soda
1 teaspoon salt
2 teaspoons ground cinnamon
1 teaspoon ground ginger
1 Cup raisins(or any kind of small dried berry)

1 Cup rice milk(or any other kind that you prefer)
4 eggs
2/3 Cup honey
1 stick or 1/2 Cup of melted butter

1 Cup finely shredded Carrots(I reserved my pulp from my juicer)

Grease two regular sized muffin tins. Preheat oven to 375 degrees. 

Mix all dried ingredients in a large bowl. 
Mix raisins in flour mixture until they are no longer sticking together.  
Mix the remainder of the ingredients in a medium bowl except the carrots. 
Pour wet mixture into dry mixture stir just until moist. Add carrots. 

Place at least 1/4 size scoops into muffin pans and distribute evenly. 
Bake for 20-25 min. Check after 20. 
If browned and when placing your finger on the top it bounces back they are finished. 

Serve immediately or place muffins on wire cooling rack. Then you may store in a zip lock and will keep for up to 4 days in a room temp house or pantry. You may label, date and store in a freezer zip lock bag and it will last for months. Although mine never last that long in my house. I have growing boys and it so nice to have that back up when we get home from work and school. I heat ours in the microwave for 30 seconds on high from the freezer. 

All are free to copy my recipe and use it for whatever they want. You may also use images of the food as well. Please don't use photos of my kids though, thank you.


Thursday, September 30, 2010

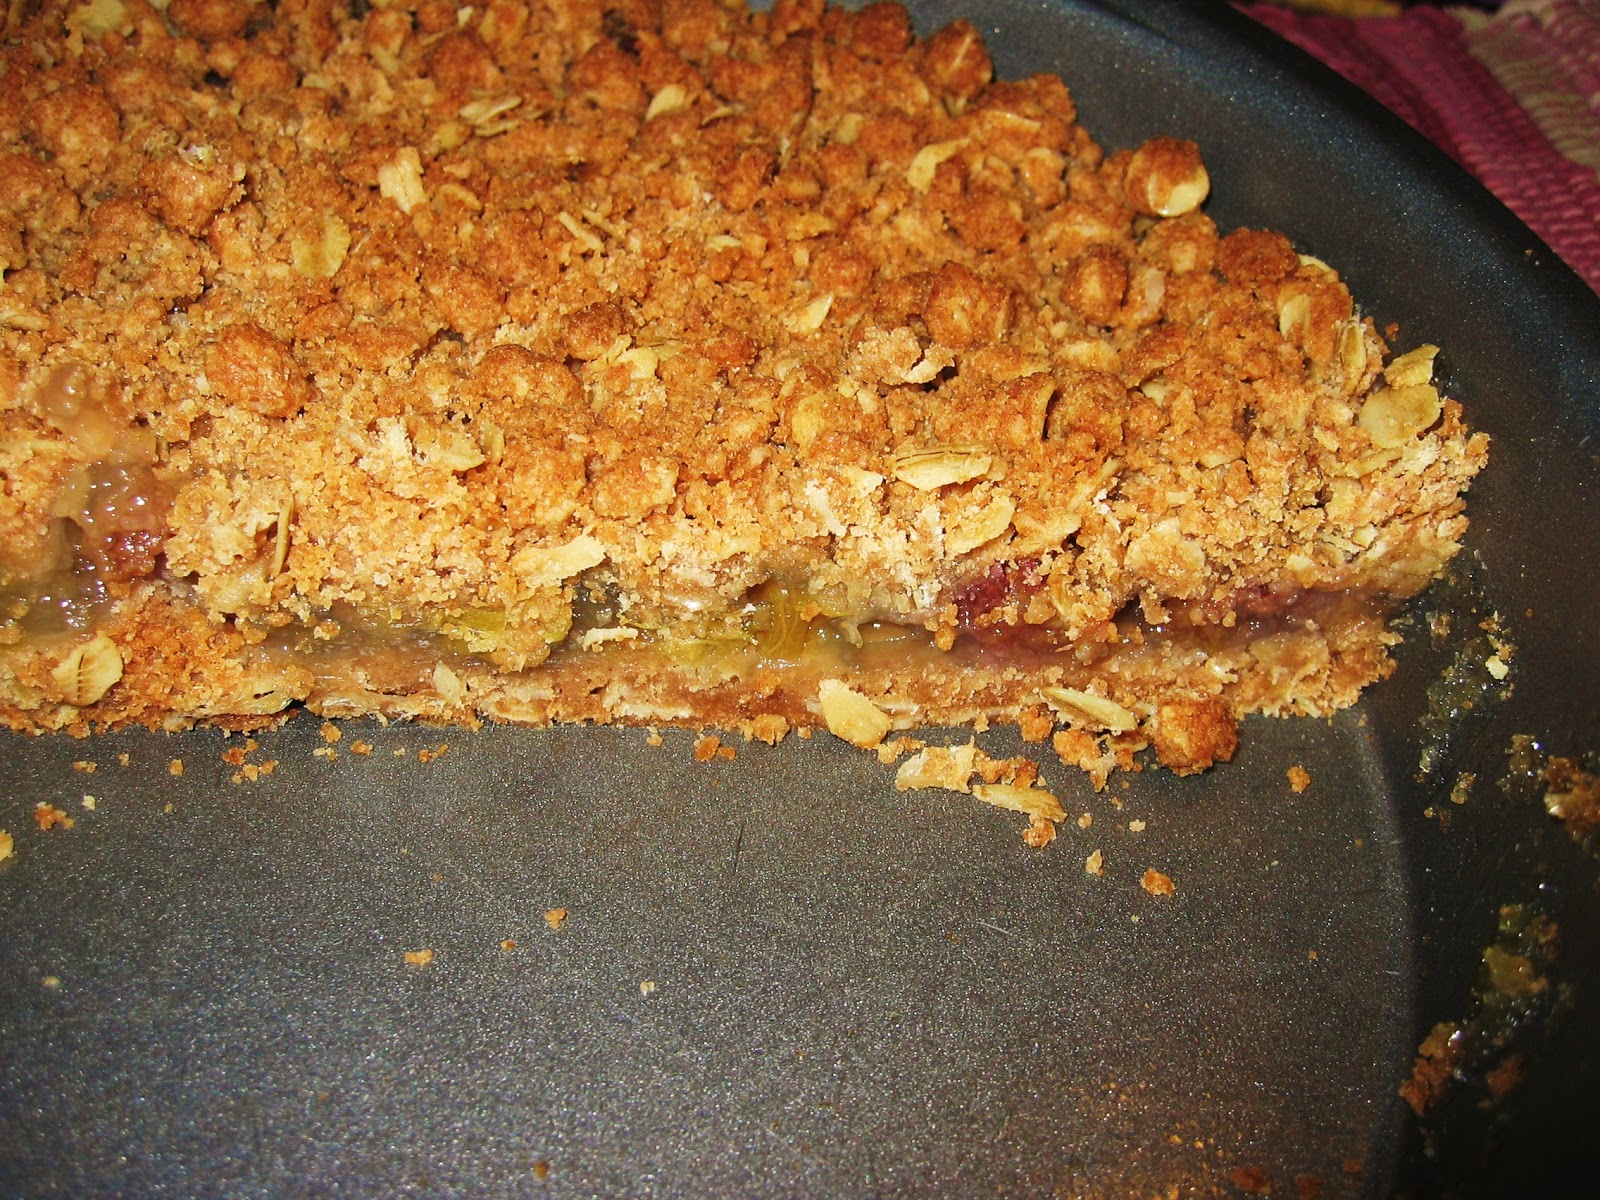
Rhubarb Crisp!

I found a really great recipe in this book that I use a lot called From Amish and Mennonite Kitchens by Phyllis Pellman Good and Rachel Thomas Pellman. I found that I had to rearrange and edit it quite a bit. For instance the temp of 450 degrees for an hour should really be 350 degree for an hour otherwise you will burn your house down not to mention your rhubarb crisp. I also felt that the sugar was way to much so I cut it in half and added more oats as well. What's a good crisp if it is not loaded with oats? So not to delay it any longer the new and improved recipe by: Abigail Turner. 
 There is nothing like a warm crisp to help you get into the mood for fall weather in anticipation for the winter months that lay ahead of you. Ahh.....I love fall!

Rhubarb Crisp
1/2 C. all-purpose flour
1/2 C. whole wheat flour
3/4 C. old fashioned rolled oats
1/2 packed brown sugar
1 stick of butter melted
1 tsp. cinnamon
1/2 granulated sugar
2 T. corn starch
1 C. water
1 tsp. vanilla
2 C. fresh or frozen diced rhubarb

Preheat oven to 350 degrees. Sift together the flours. Add oats, brown sugar butter and cinnamon until it makes a nice crumbed texture. Divide this crumbed mixture in half. Press half of the mix in a 9" square or round baking pan. 

Combine sugar, cornstarch, water and vanilla and heat on medium high in a medium size saucepan. Add rhubarb. Stir until mix starts to become clear and thick. 

Pour into your 9" pan on top of pressed crumbed crust. Crumble the remaining oat crumble mix on top of the rhubarb. Bake for 1 hour. 

Cut and serve warm with a scoop of ice cream or have some with your coffee in the morning!